Creating a customer support chatbot with Dialogflow
![]()
Photo by rawpixel on Unsplash
Why use Dialogflow?
Dialogflow is an excellent tool for creating chatbots. It is flexible, powerful and easy to use (you can read a more detailed review here). In this post we’ll cover how to create a chatbot using Dialogflow.
Example
Let’s suppose we have an e-commerce store. This is actually a very frequent use case for chatbots. Your users can make purchases but they also might want to do other things such as check their order status. Perhaps they ordered a t-shirt last week and it hasn’t arrived yet. This is a task that you might want to automate to save time from your support team.
In this article we’ll build a chatbot for checking your user’s order status in your e-commerce store.
Creating the chatbot
First of all, you’ll need to log in to Dialogflow and create a new agent:

We’ll call our chatbot “TutorialChatbot” but you can name it as you want. At this step we need to choose a language for our chatbot.

Understanding what the user wants: Intents
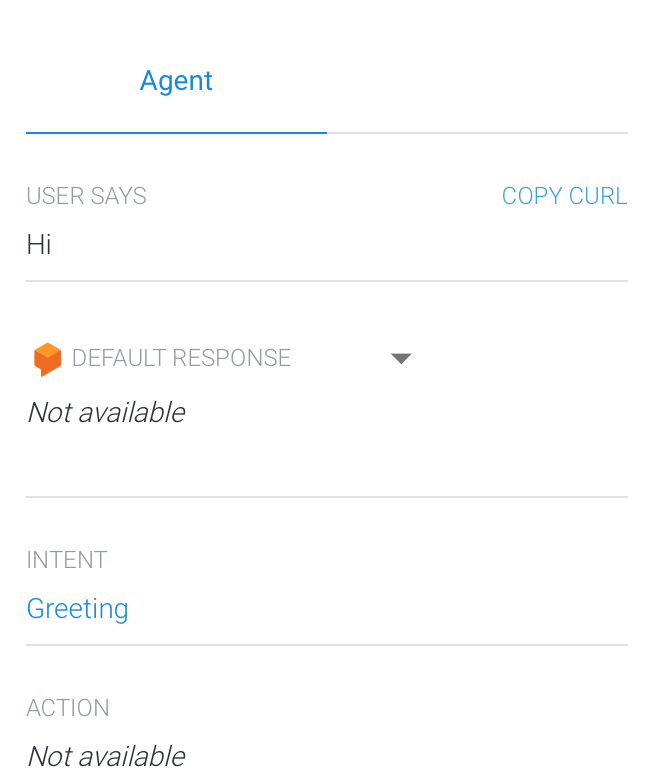
When talking to a chatbot, a user might be very clear and start a conversation by saying “I want to know the order status of order id 12345” but this is not the most usual case. Frequently a user just starts a conversation by saying “Hello” and we want our chatbot to answer the user’s greeting accordingly.
How does a chatbot work? You take whatever the user says and pass it through a Natural Language Understanding (NLU) service to extract the user’s intent like this:
Input: “Hello! How are you?” → NLU → Intent: Greeting
In this case, Dialogflow will be taking care of extracting the intent as it’s our NLU provider.
We can detect casual intents, such as greetings, goodbyes or other more business related such as check order status. We need to teach our chatbot which intents it will need to handle. This can be done by creating the intents we need as seen below. First we start by clicking the Create Intent button:
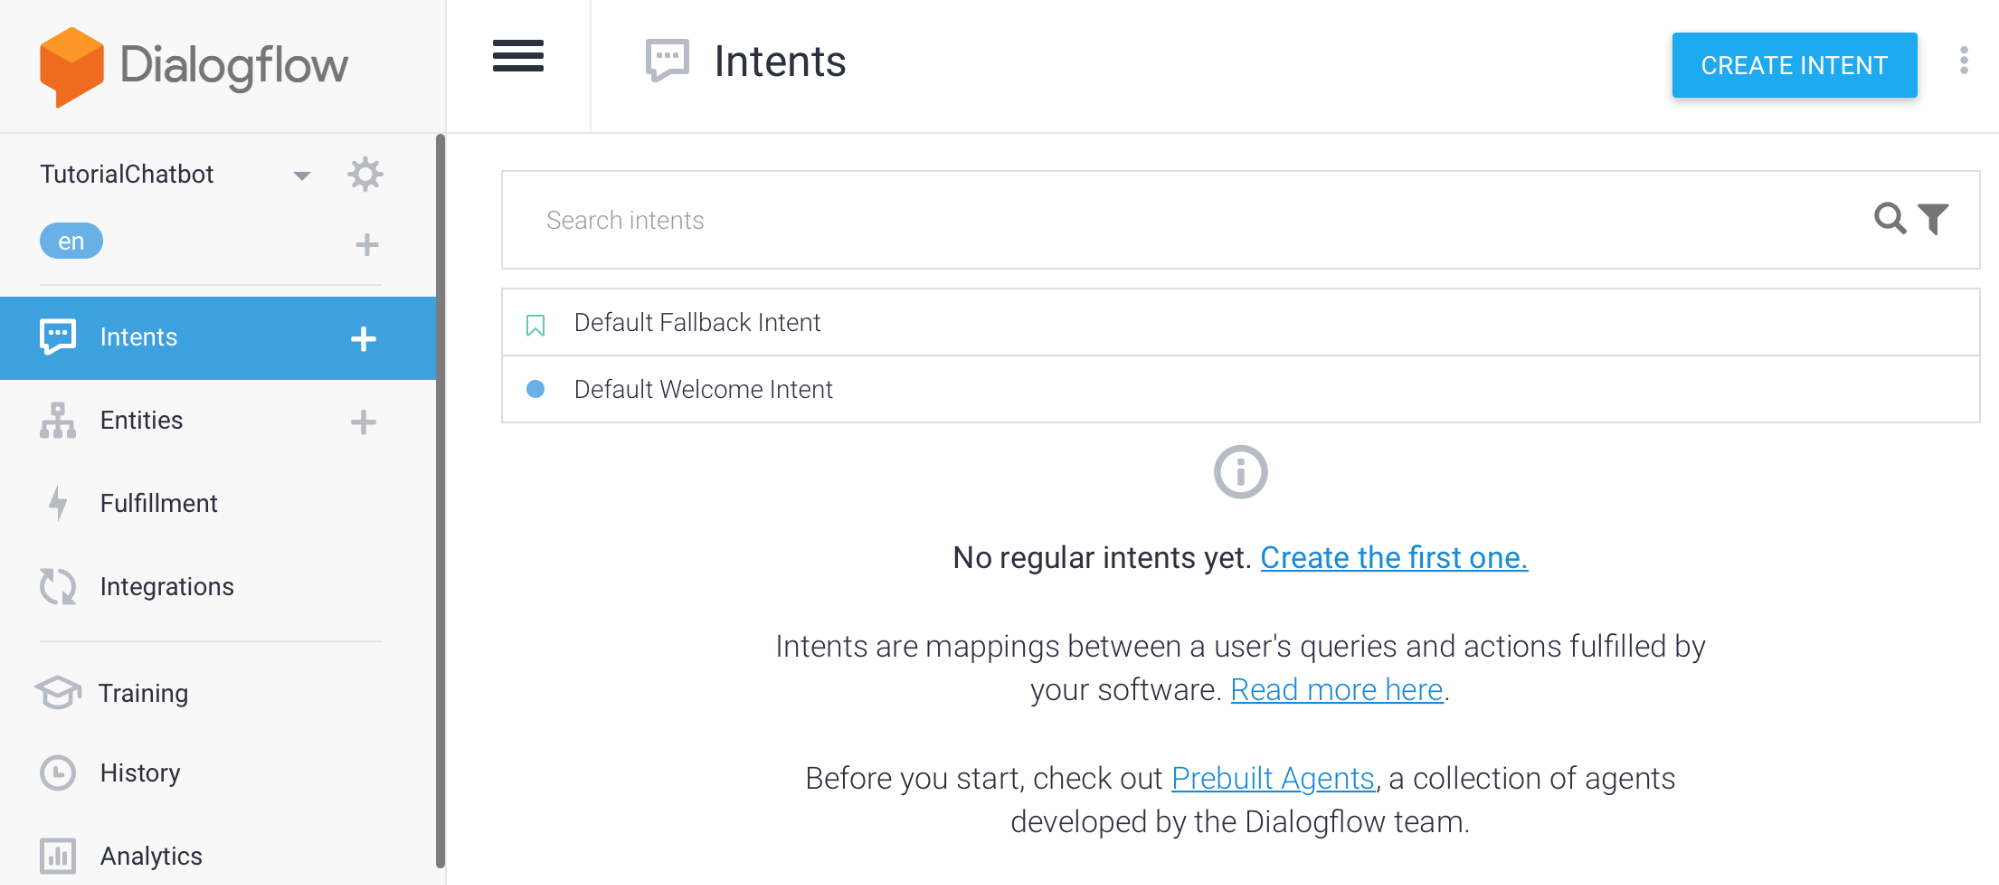
We need to specify a (descriptive) name for our intent. Always press Save after changing something in Dialogflow:
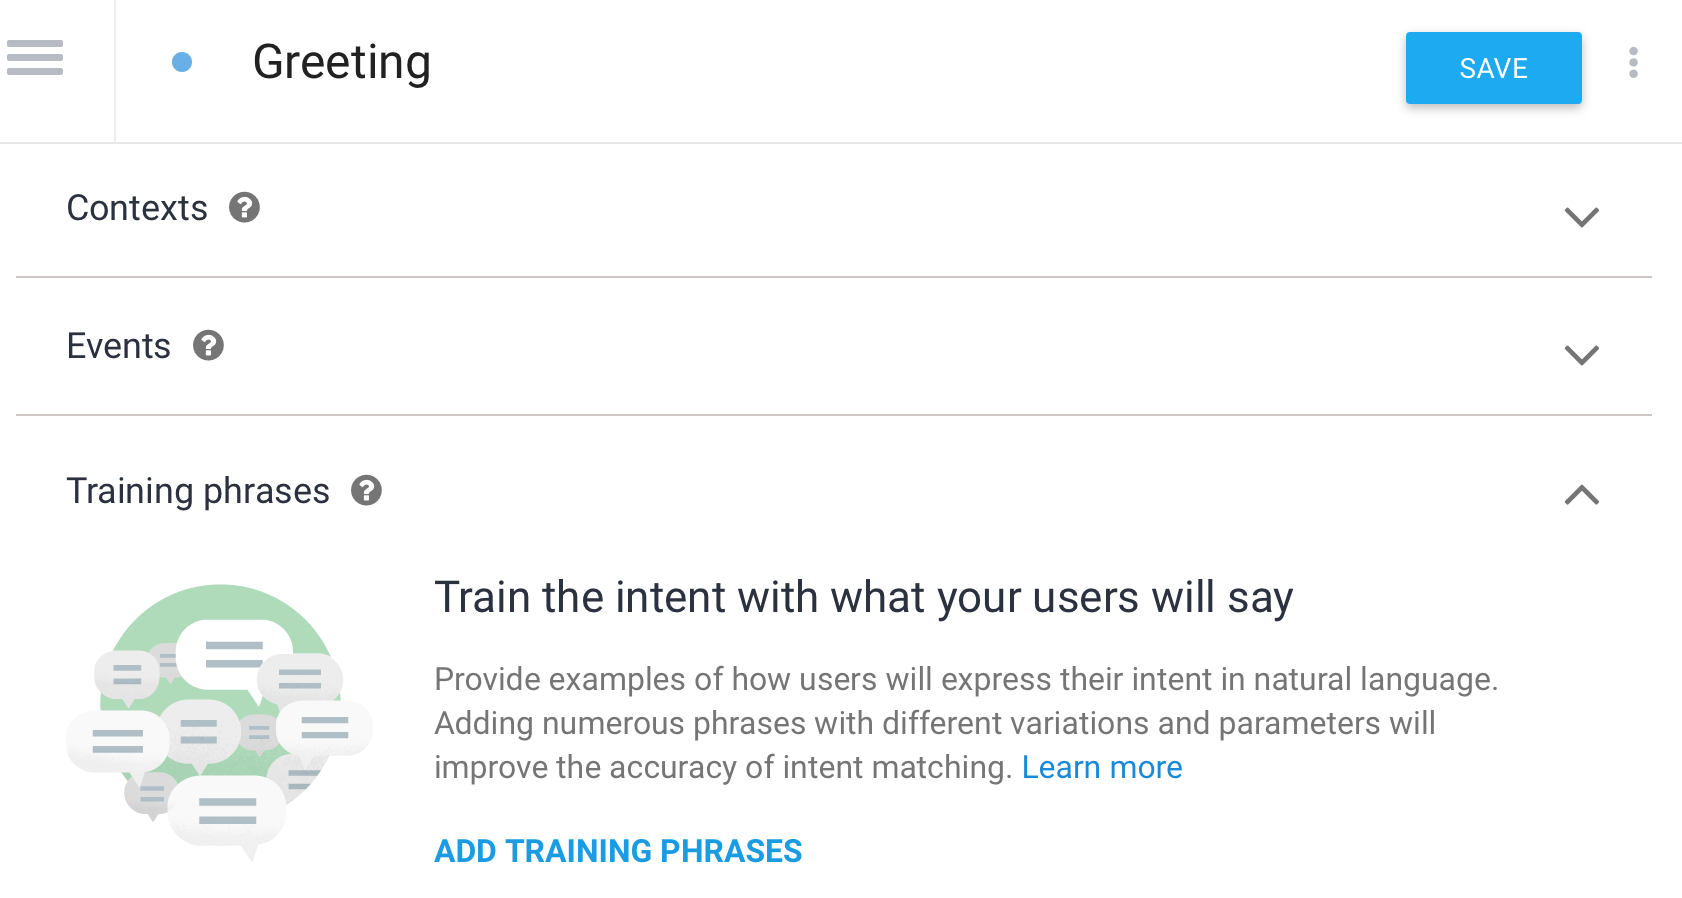
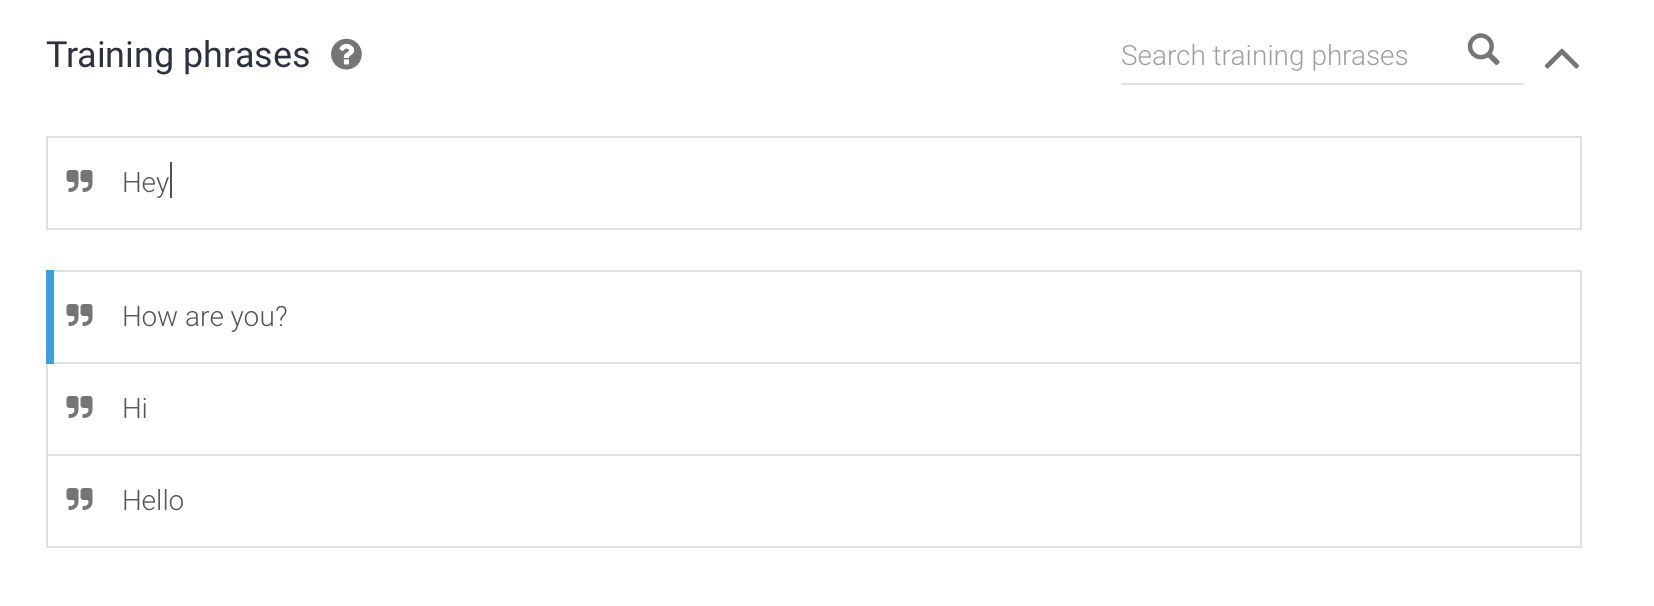
The great thing about chatbots is that if we teach it a few ways of saying something, it will be able to generalize from that. But how do we teach it? By adding training phrases to the intent. A training phrase is an example of what a user would say when trying to perform a specific action. For example, “hey”, “hello”, “hi” are all different ways a user can greet the chatbot.
Testing progress
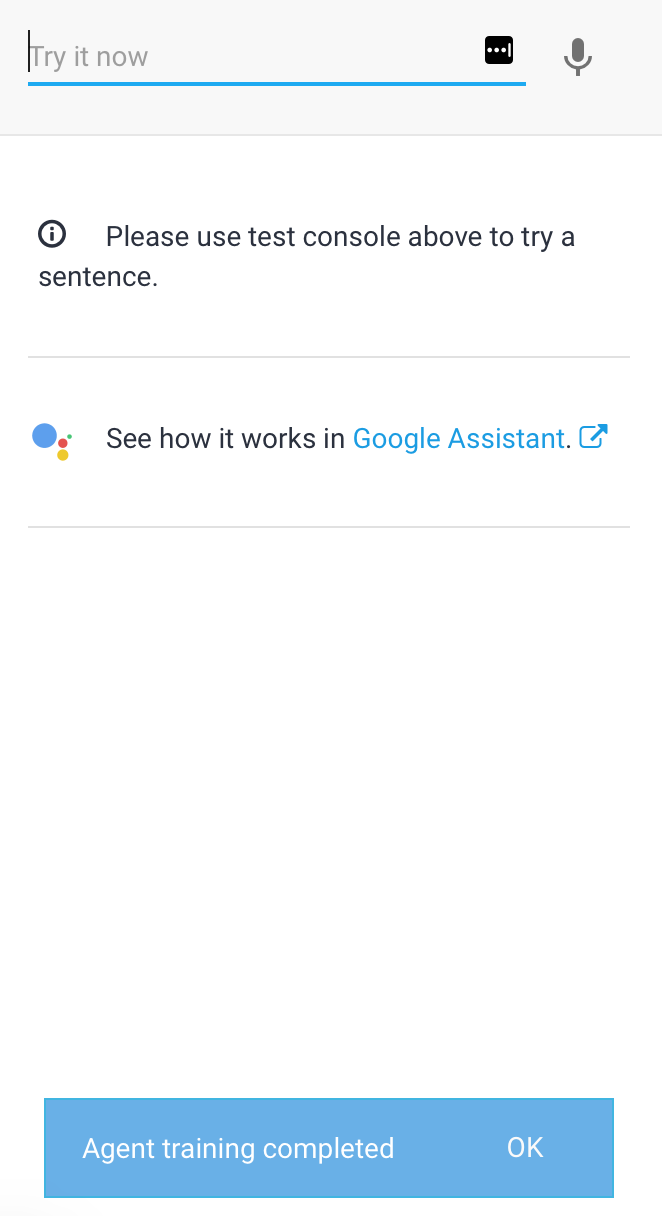
We will want to test out our chatbot. Dialogflow offers a “Try it now” tab on the right side of the screen. Just type there whatever a user might say and see if it detects the intent. It is important to wait until it has finished training as seen below, otherwise latest changes might not be taken into account.
If we type something like “Hello” we see that the detected intent is Greeting.
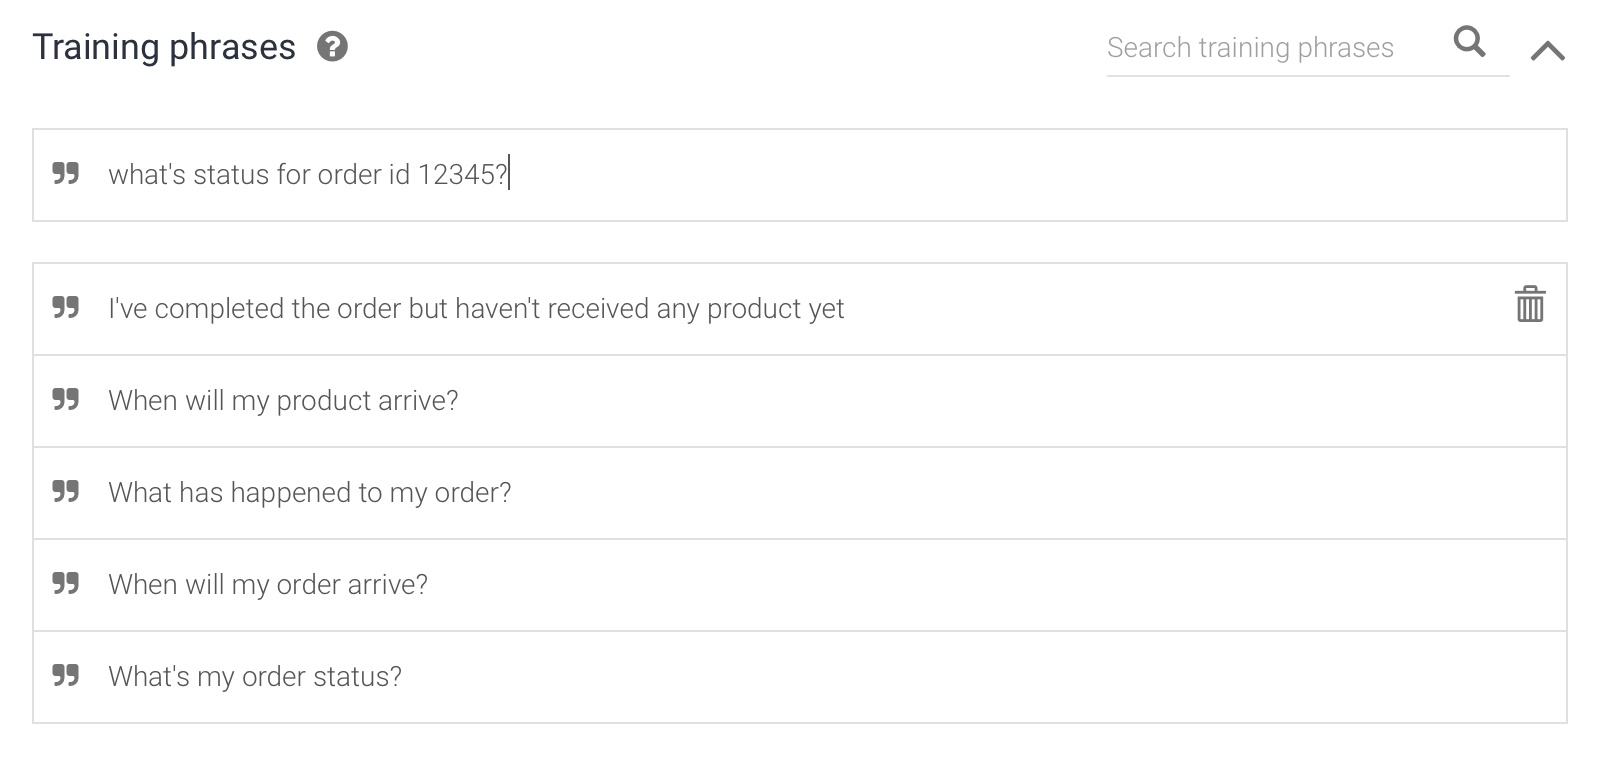
However, we still need to teach it to understand when a user wants to check its order status. We do this by creating a new intent. Let’s call it CheckOrderStatus, and adding training phrases as we just did with the greeting intent. We can add phrases such as:
- What’s my order status?
- When will my order arrive?
- What has happened to my order?
- When will my product arrive?
- I’ve completed the order but haven’t received any product yet
Getting more information: Entities
Ok, now we know that the user wants to check the status of an order… but which order? We need to get more information. We do this by using entities. An entity is a way of extracting a parameter’s value. In this case the value we want to extract is the order ID.
We can add a training phrase in which the user tells us the order ID like this:
Dialogflow will automatically detect that we have a numerical input and will select it as seen below. We just need to specify a parameter name, such as OrderID, and that’s it. We have created a new parameter using a system entity. We could add other customized entities but this will be enough for now.

All entities related to an intent will be seen in the intent’s Action and parameters section (the relationship is created when it’s used in a training phrase).
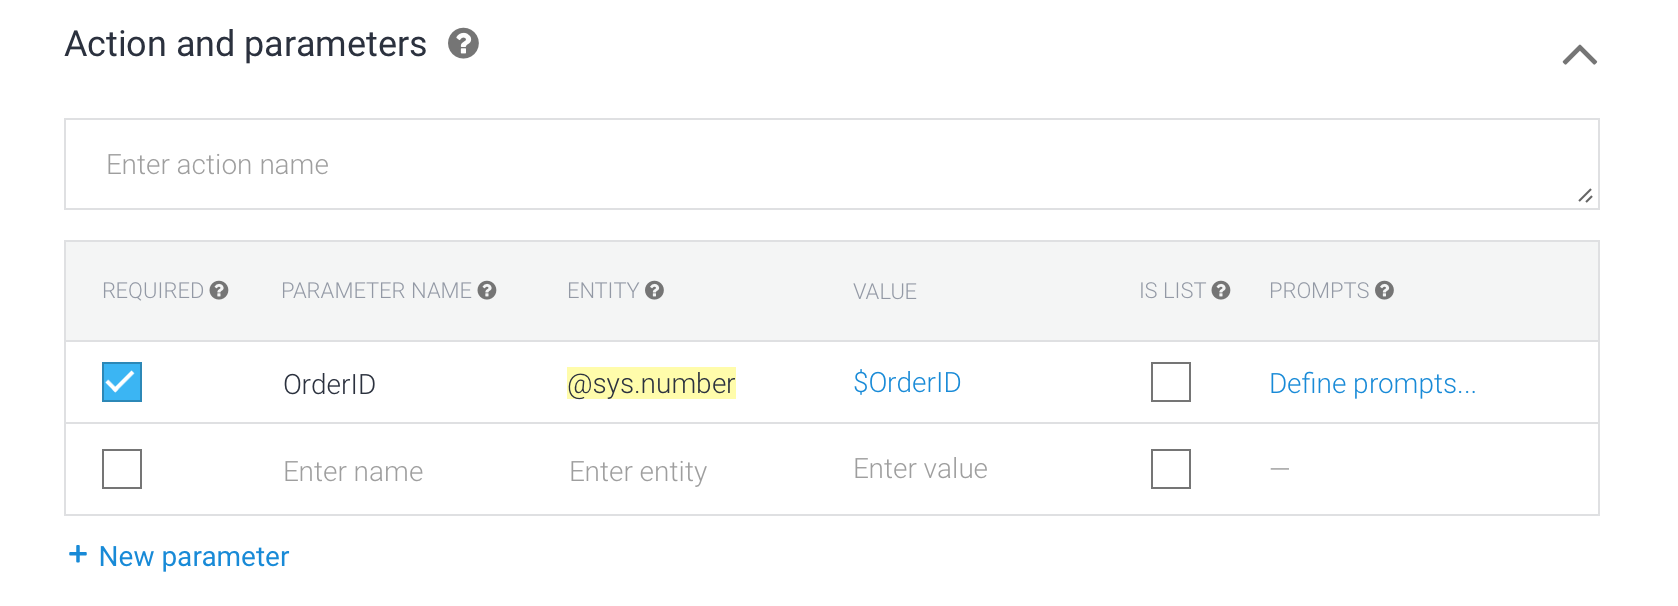
We can have required or optional parameters for an intent. For example, the order ID in this case is a required parameter as we can’t tell an order’s status without knowing its value. If we were building a chatbot for searching in a catalog, there may be optional search parameters.
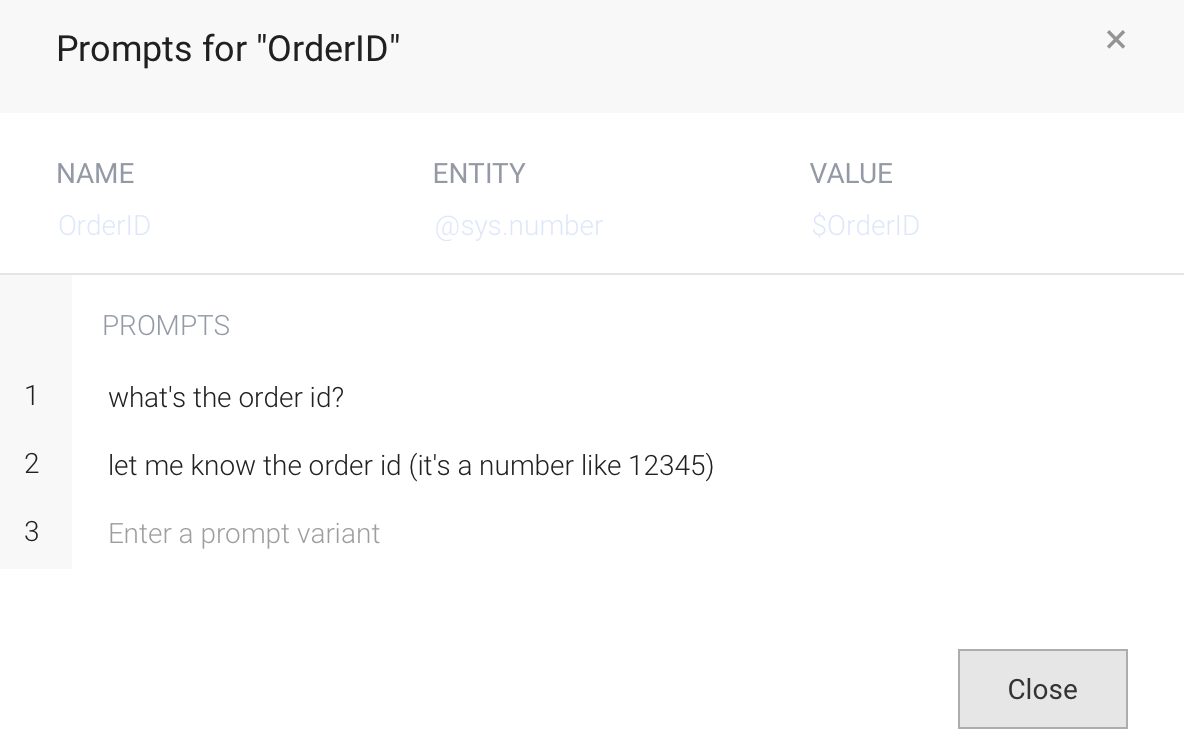
When we mark a parameter as required, we need to define prompt questions in case the user doesn’t include this information in its original dialog. We do that by clicking in “Define prompts” next to the parameter. It is a good practice to add several ways of prompting the same thing as in a natural conversation we don’t always use the same exact words and we want our chatbot to be as natural as possible for the final users.
Defining responses
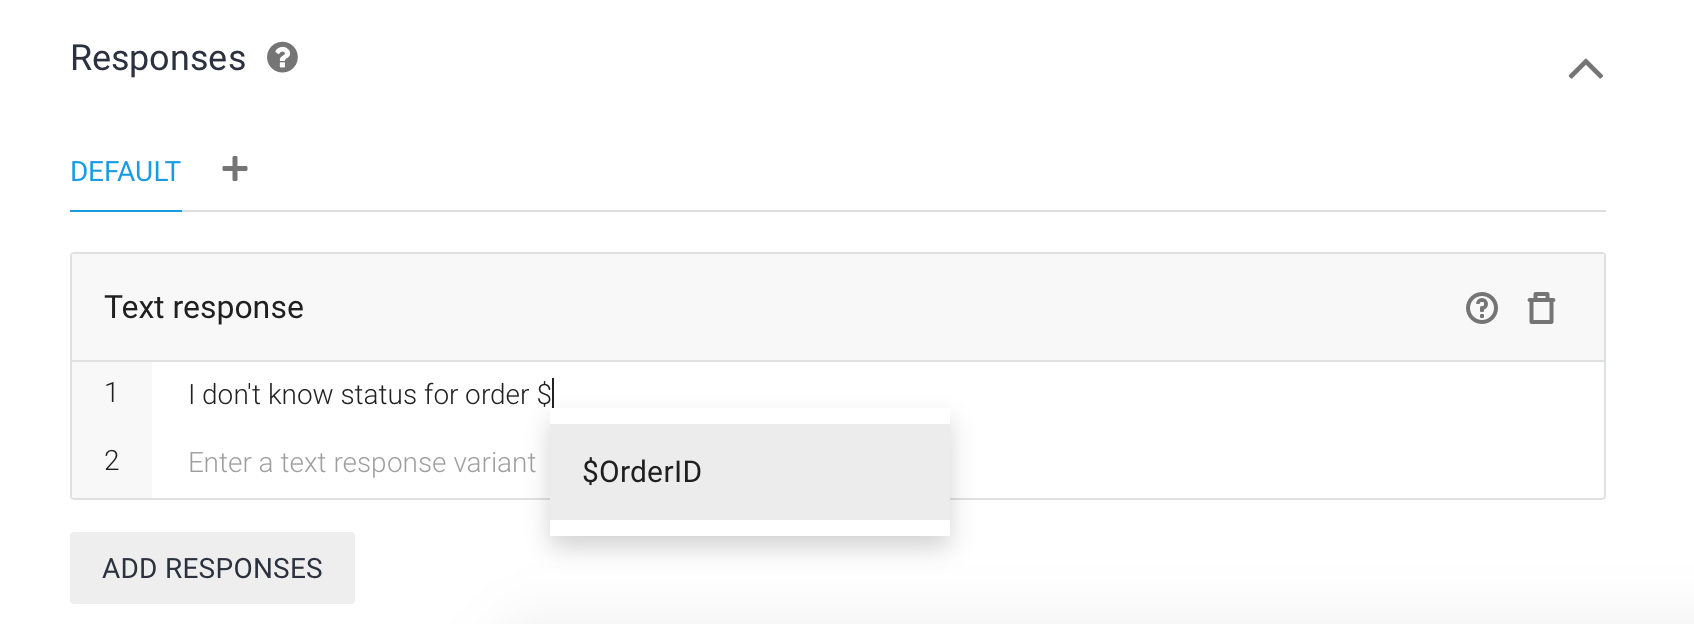
Once we have detected the user’s intent and all necessary inputs using entities, we need to define a response. We can do this in the Responses section in the intent. We can even use parameters previously collected. Just start typing $ and it will offer us any parameter available.
Once more, we will want to test the progress. Try asking for an order’s status and check if the correct intent is detected.
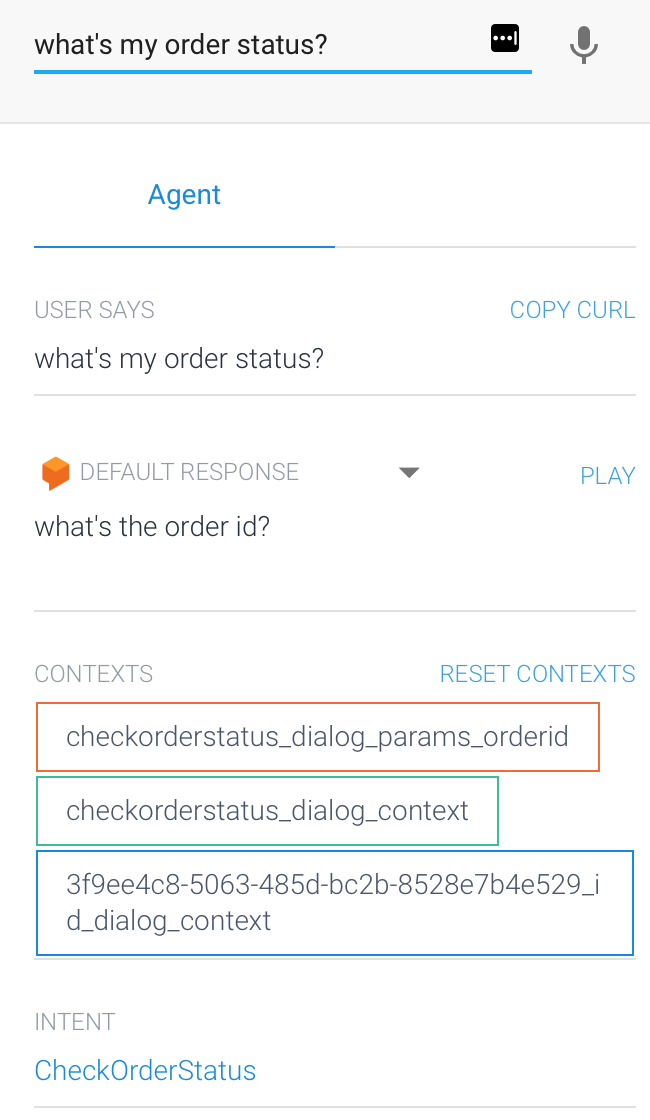
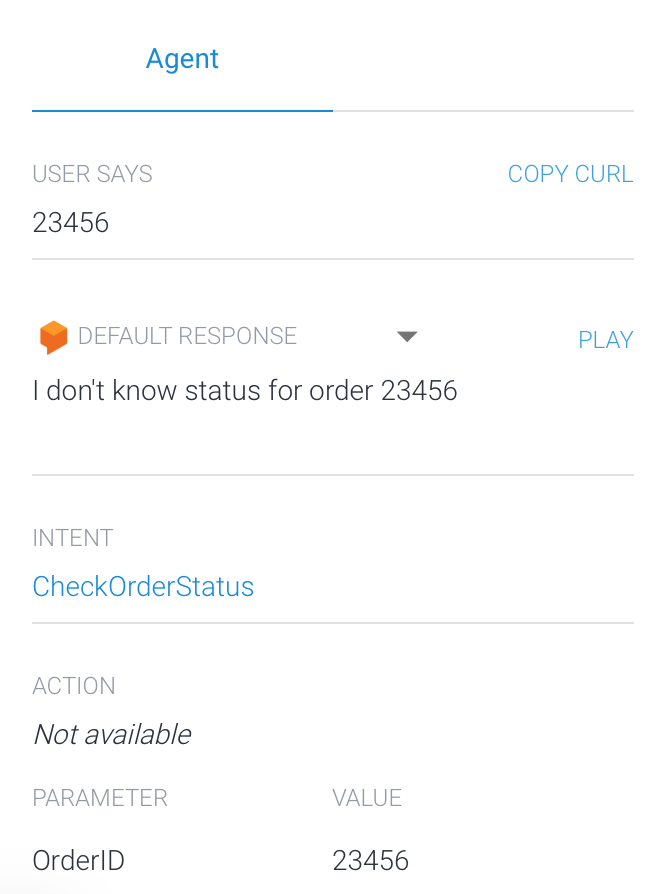
You will be prompted for the order ID in case you haven’t specified one.
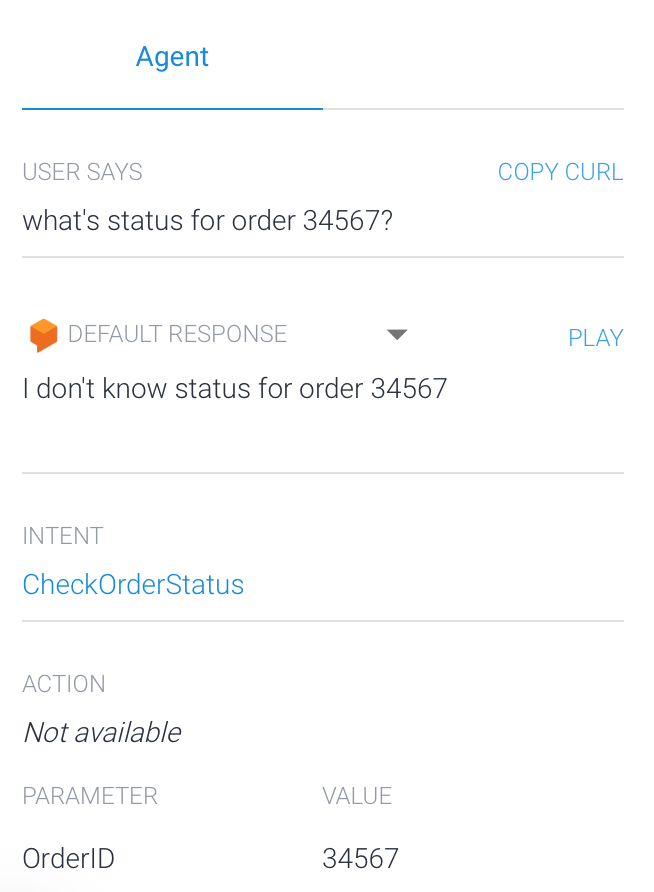
It also works without needing to prompt for the order ID. It would be annoying to say something like “I want to know the status for order ID 12345” and get a response like “Sure, can you tell me the order ID?”:
Interacting with the outside world: Fulfillment
Once we know that the user is asking for a specific order, we need to connect our chatbot with our system so it can provide an updated status. We do this by using Fulfillment. We will need to turn Fulfillment on in the intent.
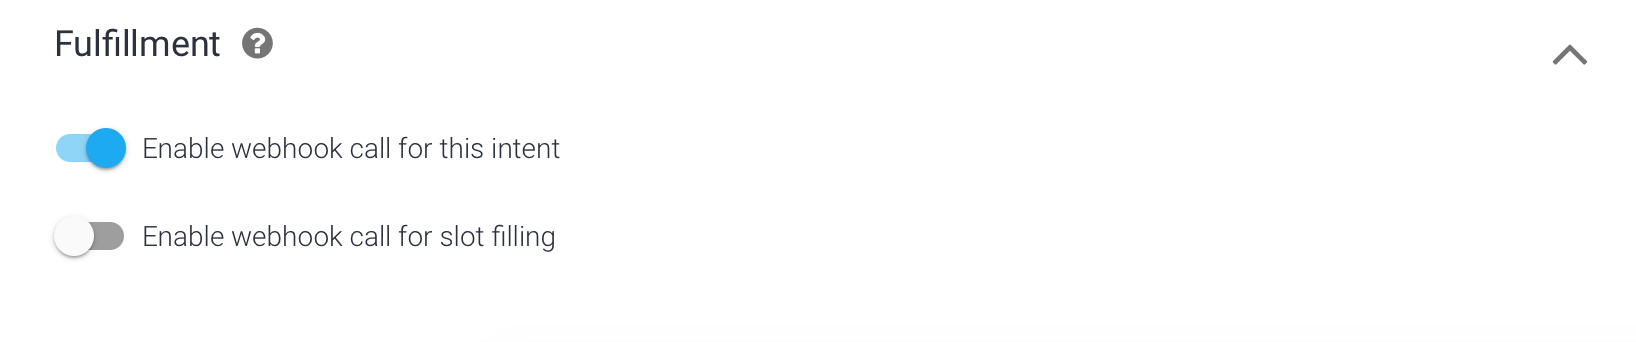
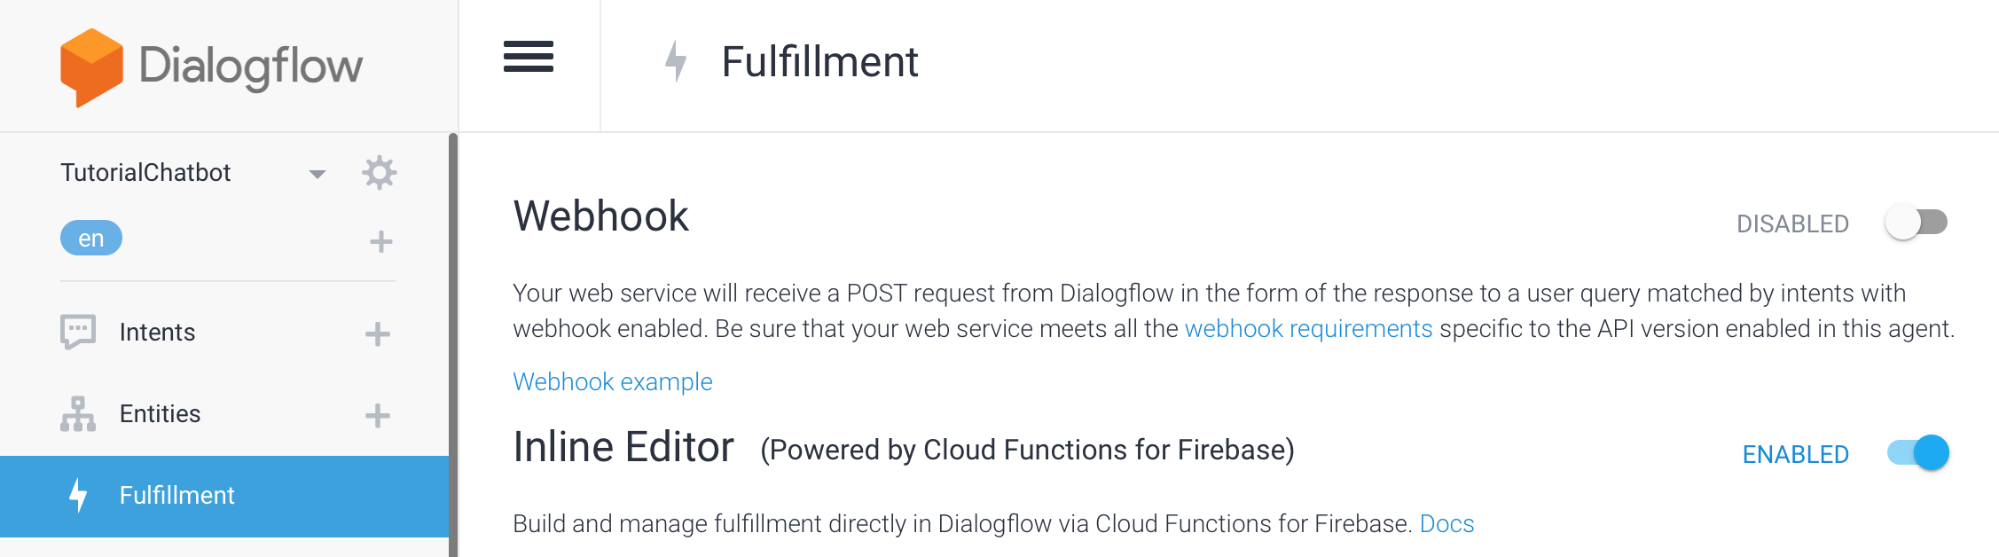
We will also need to go into the Fulfillment section in the left menu to set everything up. We can use a Webhook and connect this with our API or we can use an Inline Editor, using Node and Firebase. In this tutorial we will use the inline editor but you can do whatever you prefer:
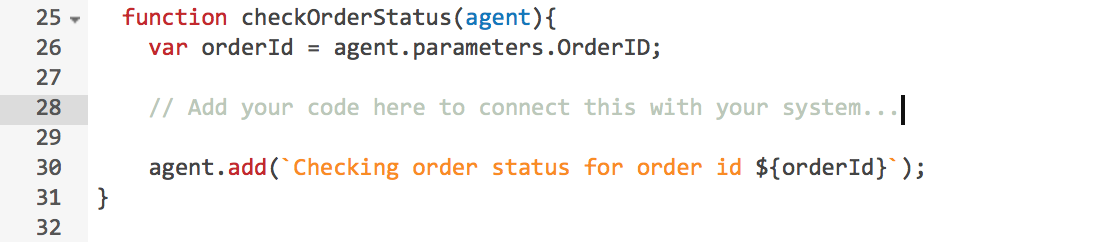
We need to add a function to handle the intent. In this case we’ll just respond to the user that we are checking the order’s status but this is the part where you connect this with your system, i.e. add your specific business logic.
We’ll also need to map the intent with the function we’ve just created. We do that by adding the name of the intent into the intentMap provided in the original code.

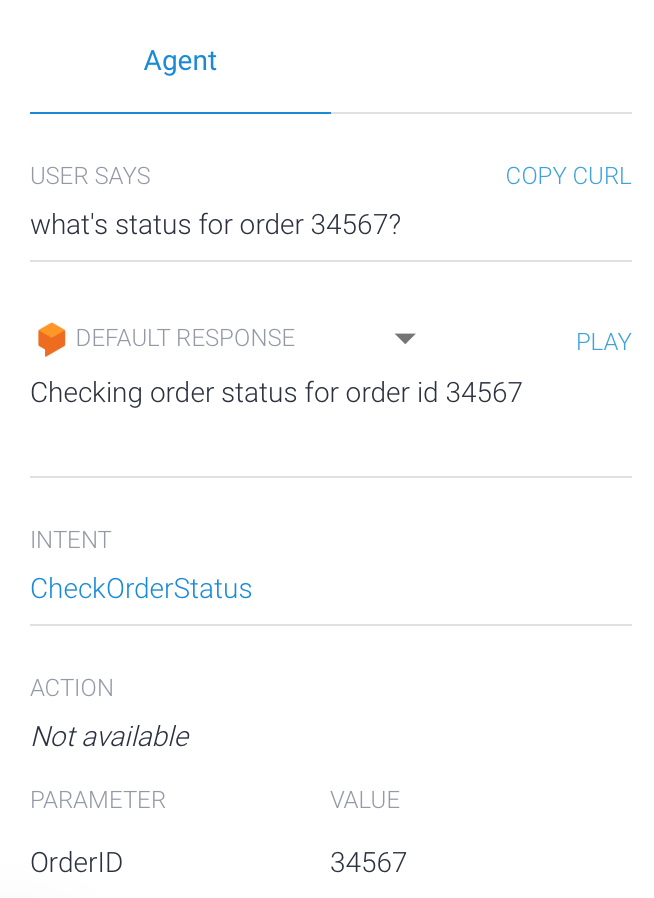
At this point, if we test our chatbot, we’ll see that the response provided in the inline editor is answered. Whenever Fulfillment is enabled, it overrides whatever you define in the Responses section inside the Intent unless there is a failure. It is a good practice to define fallback responses in the intent in case your API fails.
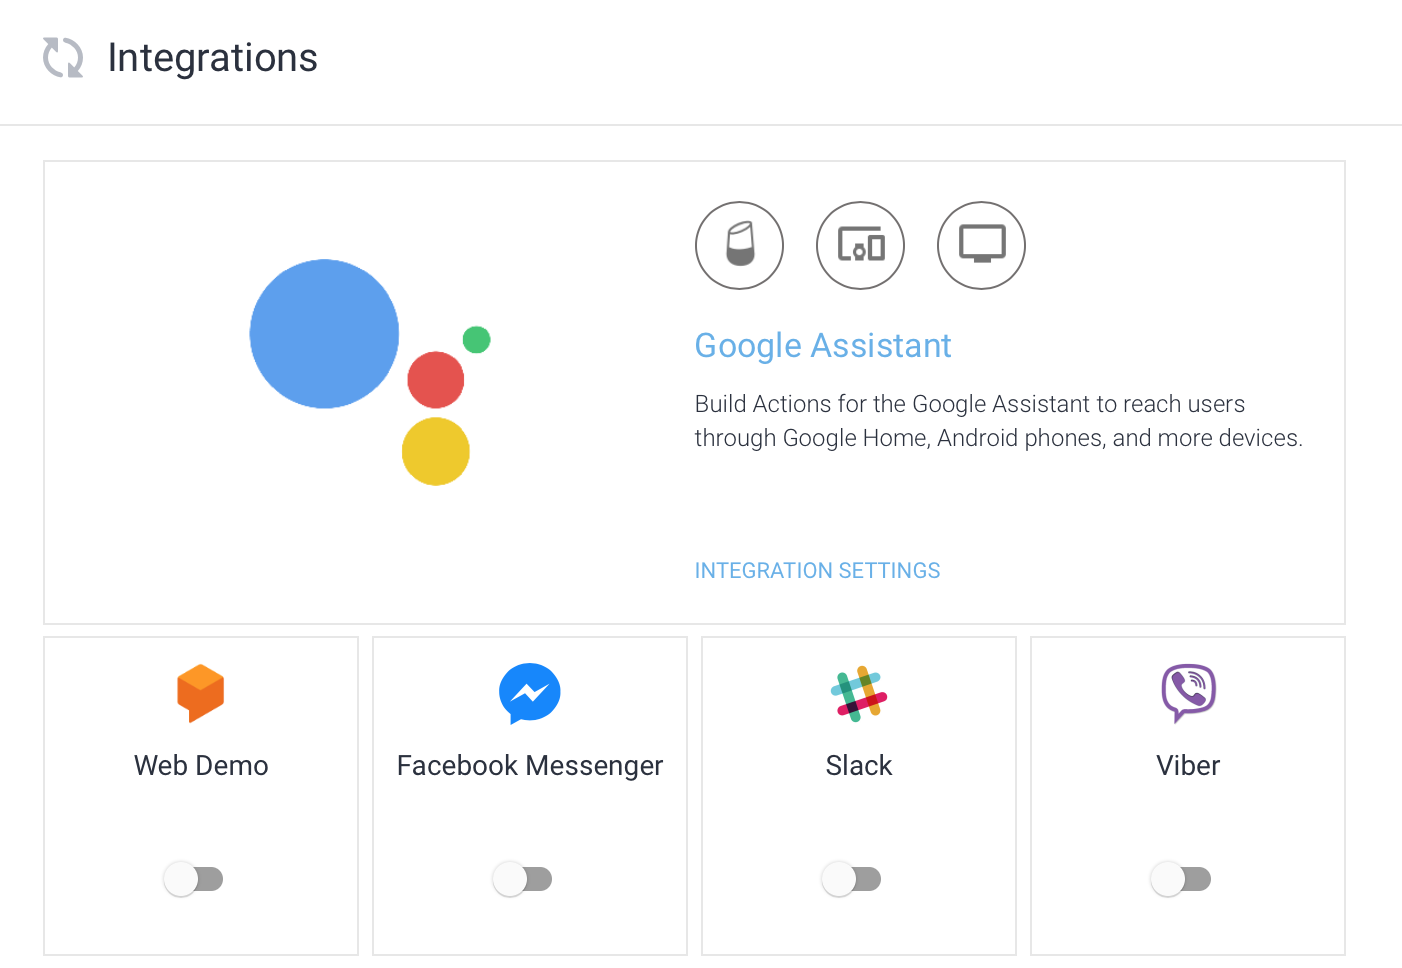
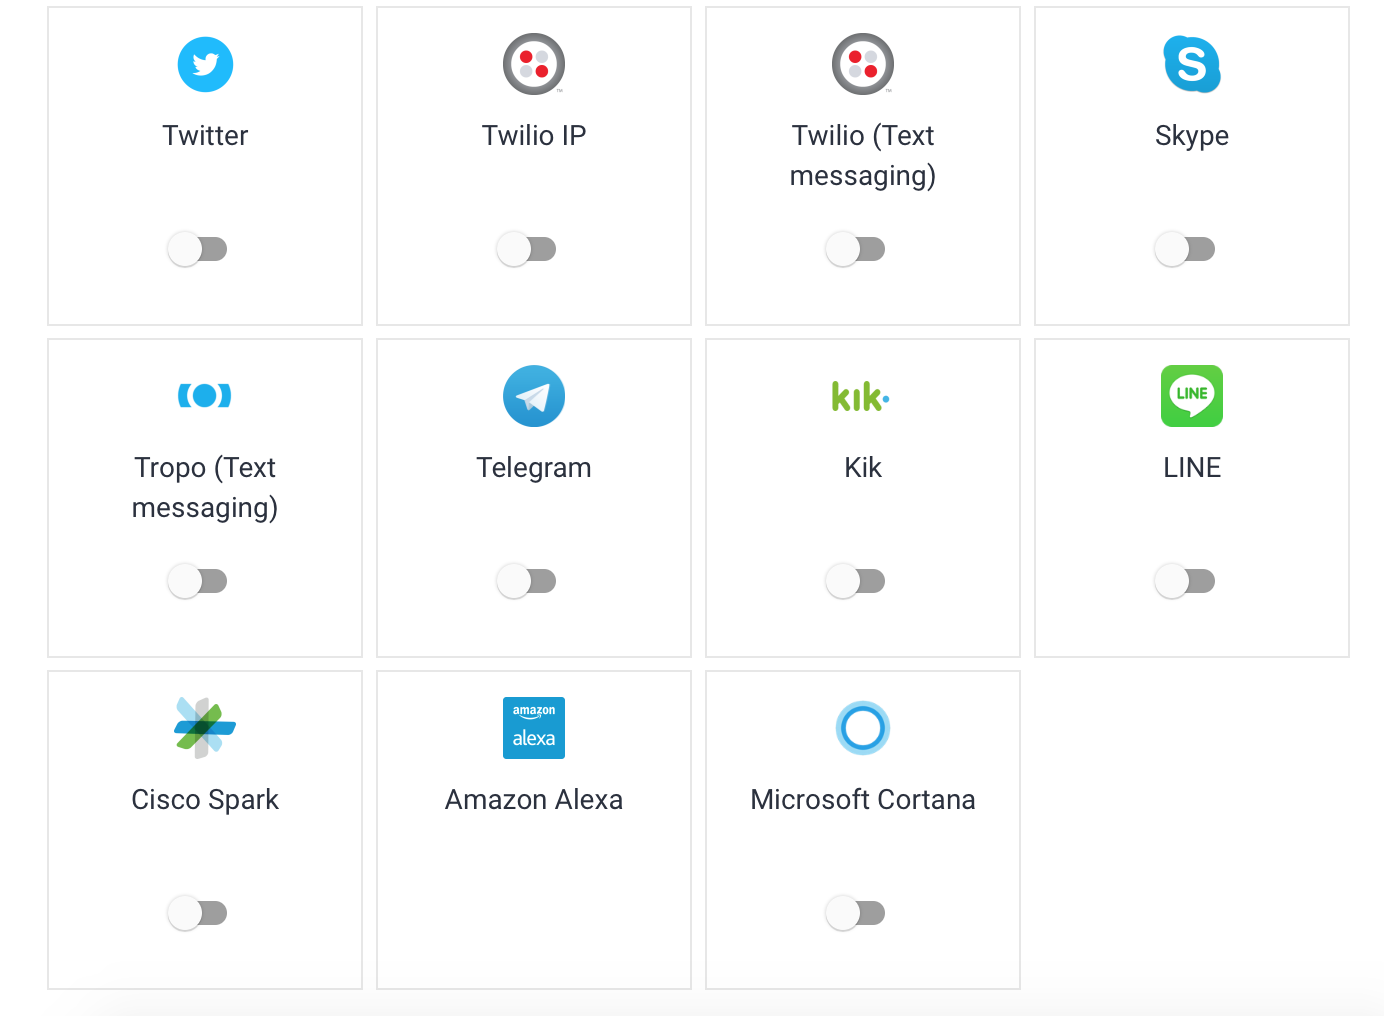
Integrations
One of the best things about Dialogflow is all the integrations it has with different platforms. It not just the variety but also the simplicity. You can explore all of them in the Integrations section:
More cool features
Another cool feature of Dialogflow is the customization that can be made using Rich messages for the different platforms. We’ll leave this for other post but we encourage you to look into them, it helps improve the user experience.
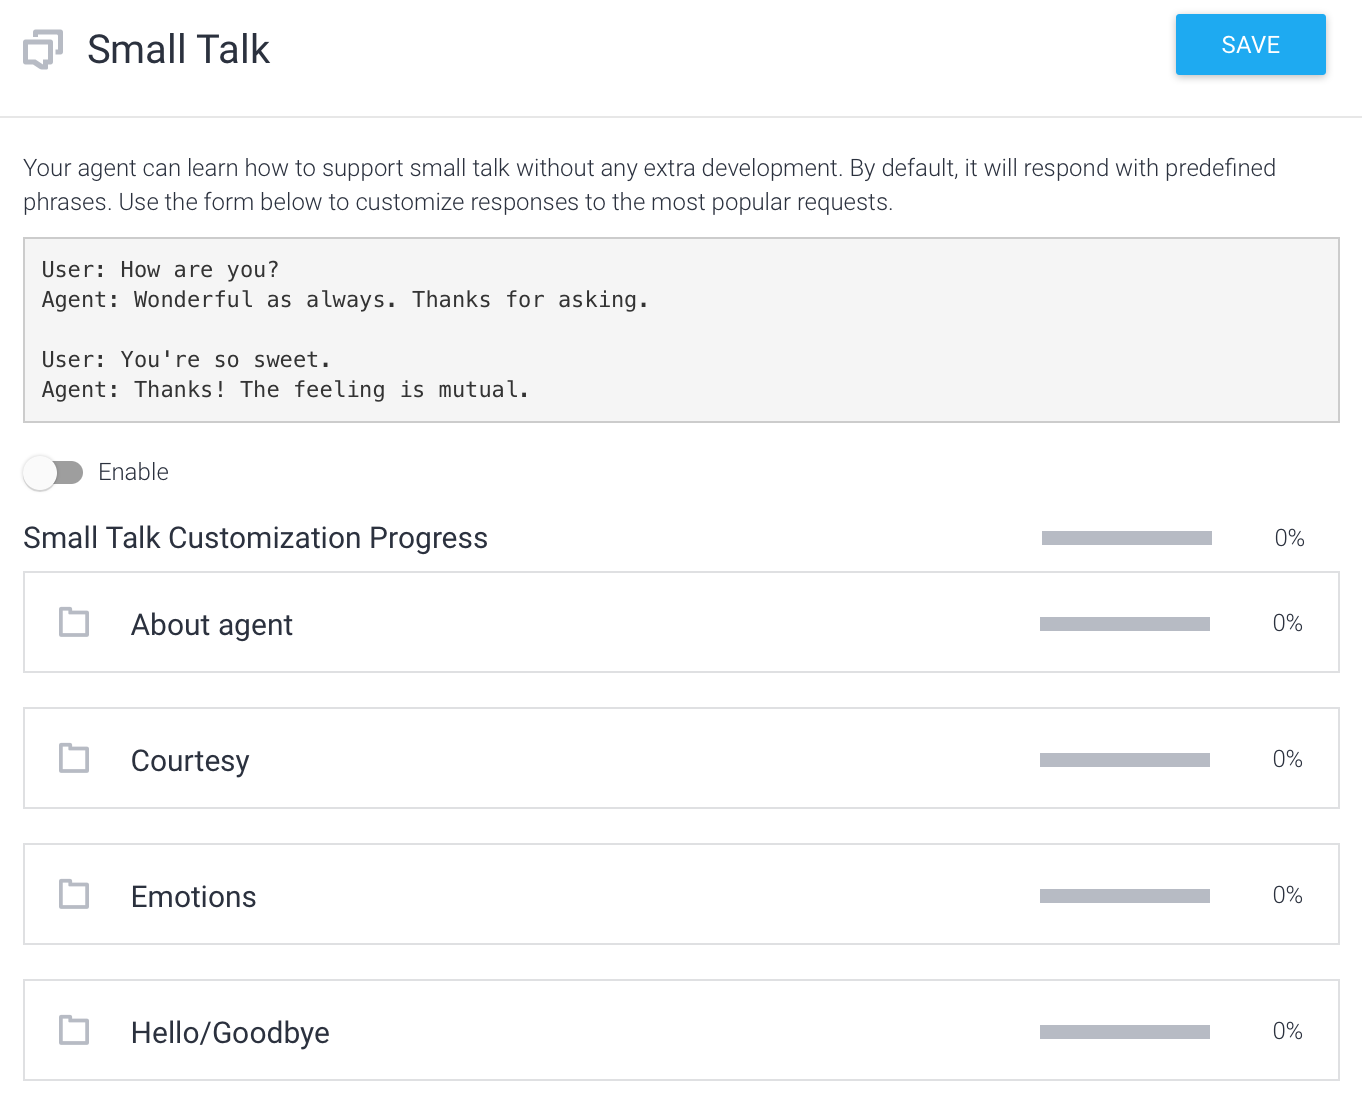
It also allows us to add small talk dialogs that Dialogflow’s team has already prepared for us. This simplifies our work and also improves user’s experience.
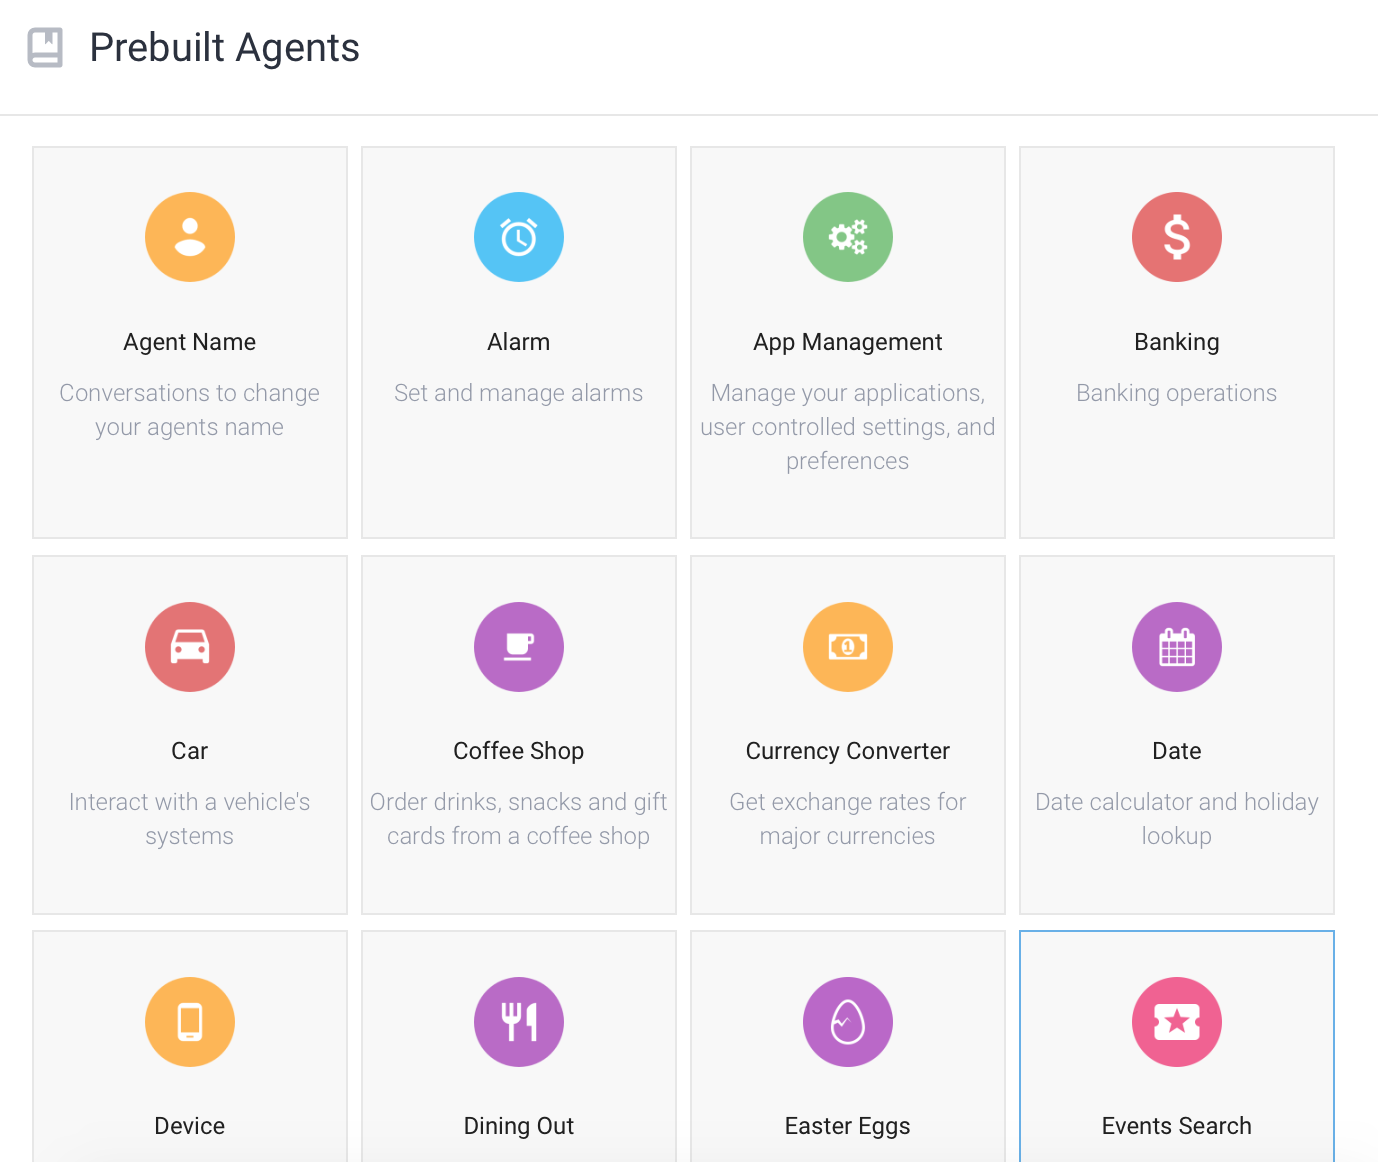
Yet another cool feature are the Prebuilt Agents. We can get a really good starting point if we are dealing with one of the use cases Dialogflow offers such as a Banking chatbot. You can explore all of them in the Prebuilt Agents section. Remember not all languages have all prebuilt agents.
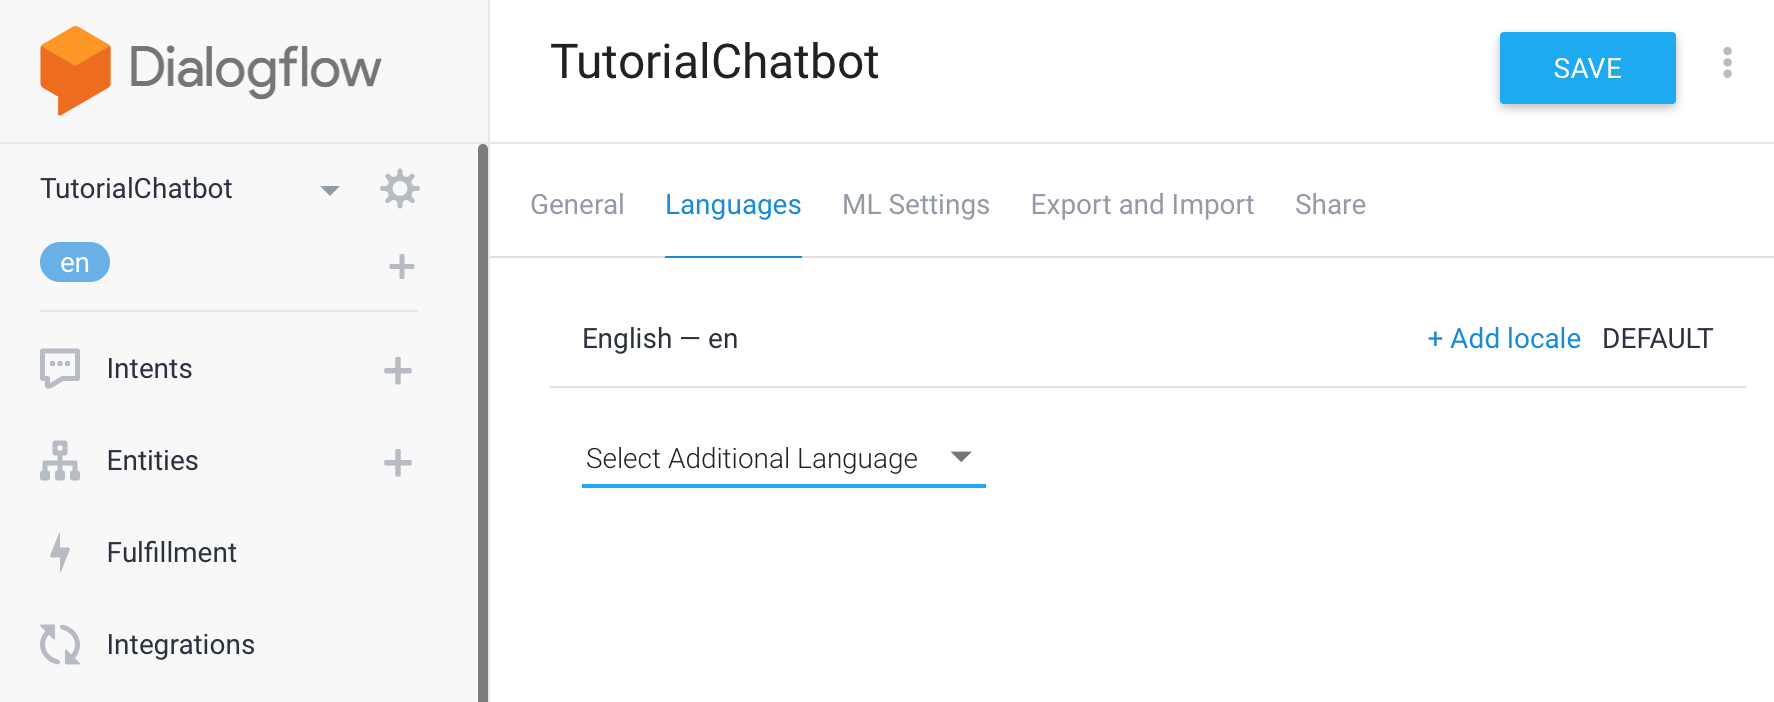
Dialogflow is one of the best platforms handling a single chatbot for different languages. It allows you to localizate your chatbot as well. If you want to add a new language, all intents and entities will be copied. You’ll just need to add the new training phrases.
Just starting
So, we’ve created a chatbot that can check an order’s status and we are able to connect that with our system. There is huge potential to extend and enhance our chatbot. We have only scratched the surface of what is possible.
All the reviews, one PDF
Choosing the right chatbot tool can be difficult. There are a lot of tools, and their quality varies a lot. The purpose of ChatbotTech is to make choosing a chatbot tool as painless as possible. We've reviewed and rated the top chatbot tools so you can quickly find the one that is right for you.
Sign up below and we'll send you a free PDF containing all the reviews, and ChatbotTech's guide to choosing a chatbot. We'll also send you occasional news and updates (no more than once a week).